Edit detail for SpectrumNavigation revision 2 of 6
| 1 2 3 4 5 6 | ||
|
Editor: damberger
Time: 2009/11/10 12:20:16 GMT+1 |
||
| Note: updated tracker address | ||
changed:
-    - nmrPipe xxx.pipe (3d spectra: all planes must be in "one file":http://www.cara.ethz.ch/Tracker/0393)
    - nmrPipe xxx.pipe (3d spectra: all planes must be in "one file":http://tracker.cara.nmr.ch/0393)
Navigating in a spectrum
To begin with we will use the Tool "Open Spectrum" to learn how to view and navigate in a spectrum. After mastering the basics we will create a project, load spectra and use the more advanced features of Cara. Once we start working with projects the Open Spectrum tool can still be used to have a look at an external spectrum (e.g. for processing). So lets get started...
- Start CARA and use Tools > Open Spectrum
- Open an NMR spectrum. Formats available:
- XEASY xxx.param
- Bruker processed file rr / rrr (the procs files must be in the same directory as the rr files)
- Sparky xxx.ucsf
- nmrPipe xxx.pipe (3d spectra: all planes must be in one file)
- CARA xxx.nmr
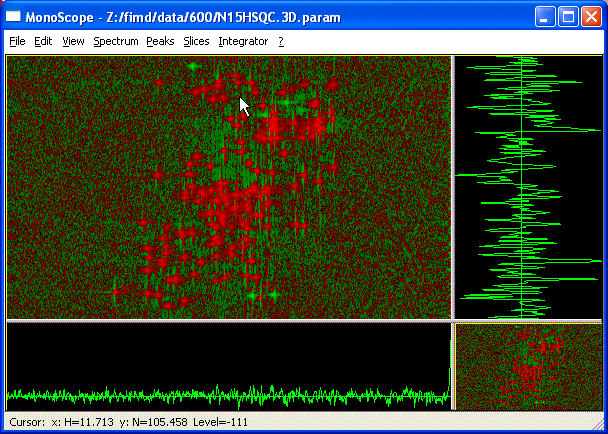
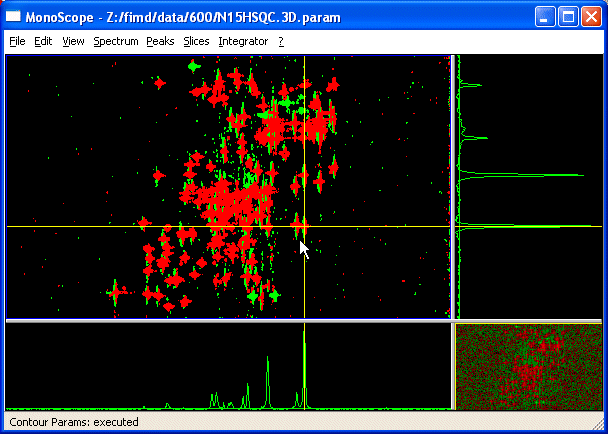
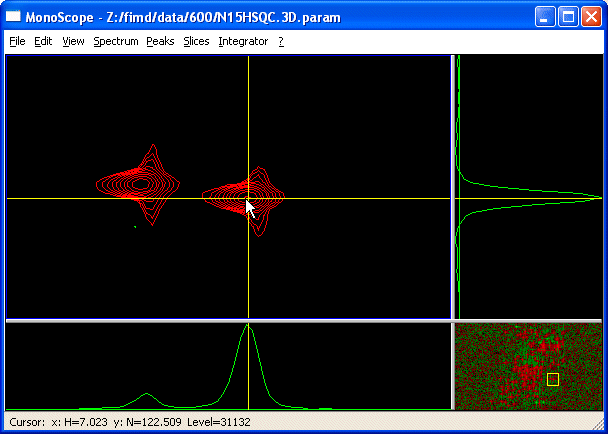
- CARA displays the selected spectrum in a MonoScope? Window. The Window is composed of 4 major parts: the main spectrum window, two slices along the x- and y-dimensions and an overview window in the lower right corner.

- CARA displays the spectrum in AutoContour? mode which sets the contour level in each spectrum automatically (View > Auto Contour Level) but you can also set contour parameters manually (View > Set contour parameters..., shortcut: cp). One can also display the spectrum in intensity mode using View > Show Intensity
- Shortcut: si to switch intensity on/off
- Shortcut: sc to switch contours on/off
- Click on an NMR cross peak in the main spectrum window. Yellow crosshairs appear and the x- and y-slices are updated.

- The crosshairs can be moved with a mouseclick. For small changes, the arrow keys on the keyboard can be used. Combining the arrow keys with the Shift-key produces larger movements.
- Zoom into an area around the peak. You can either press Ctrl+Shift while click-drag selecting a region in the spectrum with the mouse or use the small overview window at the bottom. Simply select a rectangular region with a click-drag.

- To move the selected expansion, you can use the mouse by click-dragging with a pressed Ctrl-key like pushing a piece of paper with your finger. Alternatively, you can use the overview window. Simply clicking in the Overview window moves the expansion onto the new location, a click-drag selects a new expansion in this position.
- You can use the keyboard: Ctrl+Arrow keys move the region a small distance, Page Up and Page Down move up and down by one expansion, Ctrl+Page Up and Ctrl+Page Down move left and right.
- To change the expansion size, use Ctrl+Shift+Arrow keys. This will enlarge or shrink your selected window. The Home key (or View > Fit Window or text shortcut ww returns to full spectrum view.
3D-spectra:
The third dimension is represented by an additional slice to the right. You can use this slice to change the currently displayed plane by clicking at a new position in the slice or by using the arrow keys (small movements) after activating the slice window, or bp / fp to go one plane backward / forward (keyboard shortcut: Shift-PageDown / Shift-PageUp).
Frequently, it is easier to navigate in a 3D by using an additional 2D spectrum. SynchroScope? and PolyScope? are the right tools for this.
NEXT: PeaksAndPeaklists?
Return to GettingStarted?
Return to FrontPage?